Databases and database users.
Databases and database users are fundamental when operating a web application. From a programming perspective, the web application code is quite static, and all the variable information (information which varies between websites) is stored in a database.
The web application (in our case, that’s WordPress) needs to be configured to connect to the database, as the database user. This usually involves defining the datbase and database user ina config file that’s part of the web application (wp-config.php in the context of WordPress).
This post covers how to create a database, a database user and how to assign the user to the database.
Manually creating datbases and database users.
We’re going to be manually installing WordPress in a later post. You’ll need to carry out the steps in the guide below before you can install WordPress. This is because WordPress will need to be able to connect to a database when you install it.
Yes, there are one click script installers such as the Wptoolkit and Softaculous that can be used to install WordPress in a few clicks, but if you use these you don’t really gain an idea of what’s happening underneath and how things work together. Without that understanding you’re likely to find things harder (or at least harder to understand) in the longer term, and you’re also not going to know how to fix things if they break.
That’s why we’re going to be doing things manually. You’ll learn as you go by manually installing, and probably gain more knowledge and understanding than it feels like you are.
You can use a script installer to install WordPress if you like, and there’s always the option of paying someone to do this for you, if you’d rather simply focus on creating content.
Not only is what this guide covers applicable to installing WordPress, it’s also an aspect involved in moving a WordPress site from one hosting provider to another. If you gain an understanding of databases, database users, and the site’s config file, you can manually install any web application, and you’ll be able to move any web application. Not just WordPress, but any PHP database backed web application. They all work in the same way.
Databases and web applications.
WordPress (and most other CMS’) use a database. Generally speaking a web application or CMS will be made of code (usually PHP) and information stored in the database that the web app or CMS uses.
The two (PHP and the database) are effectively connected by some sort of config file that tells the PHP code how to connect to the database. This usually consists of declaring the database name (to be connected to), the host (where the database exists) and the database user and their password (who to connect to the database as). All PHP based database backed CMS work like this.
Databases are used to store variable information used by programs. Generally speaking, in programs, the code is fairly static, but there are some aspects that are user specific so vary between installations. This isn’t static, so somewhere is needed to store this type of information and update it as things change, without having to update a code base. That’s where databases come in.
Let’s say you have 2 different sites both made using WordPress. They both have different site addresses, so the addresses themselves vary between installations. See where I’m going with this? Yes, that’s right, the site address is stored in the site’s database, because it’s variable (something that varies between WordPress installations). There’s a whole load of other stuff that goes in the database. All the page content, options you enable in plugins, WordPress users and their passwords. All of this is variable information so gets stored in the database, plus a lot more.
Most of the time, on a web hosting platform the database server that’s used is MySQL. MySQL has it’s own user and permissions mechanism. This means that you have to set up both a database, and a database user to allow WordPress’ code to connect to and therefore use a database.
It’s not as difficult as it sounds:
- Create a database
- Create a database user
- Assign the database user to the database (and grant permissions)
- Update a config file with the above
You’re going to need to provide WordPress with the database name, the database user’s username and the database user’s password (to allow WordPress to connect to, and use the database), so make a note of these as you go.
You’ll be specifying these in WordPress’ wp-config.php file (as this is the config file that effectively tells wordpress the name of the database, where it exists, and who to connect as when accessing or updating information held in the database). That part is covered in the installing wordpress article.
Creating a Database.
You’ll be creating these within your hosting account. All of the steps below are carried out in the “MySQL Databases” section of cPanel.
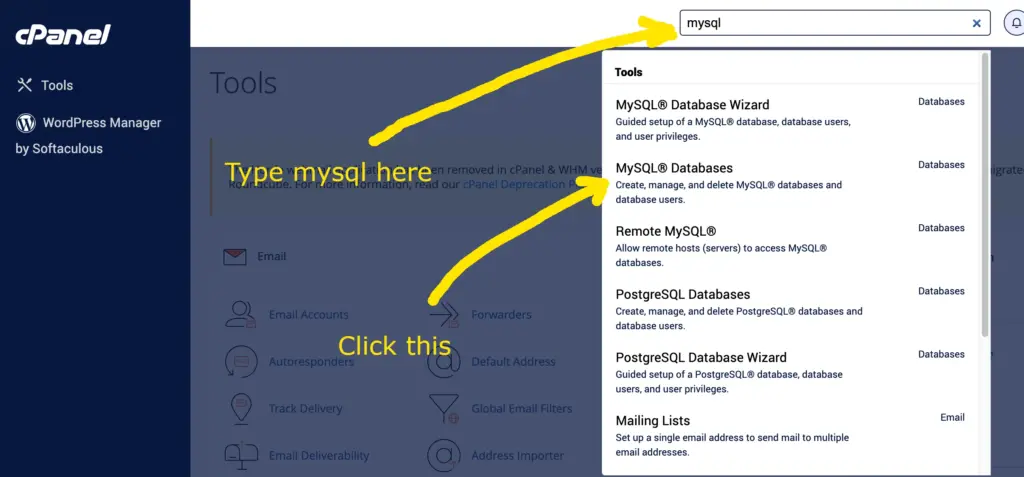
You’ll need to log in to cPanel, then in the “search tools” box at the top type mysql then click on “MySQL databases”, like this:
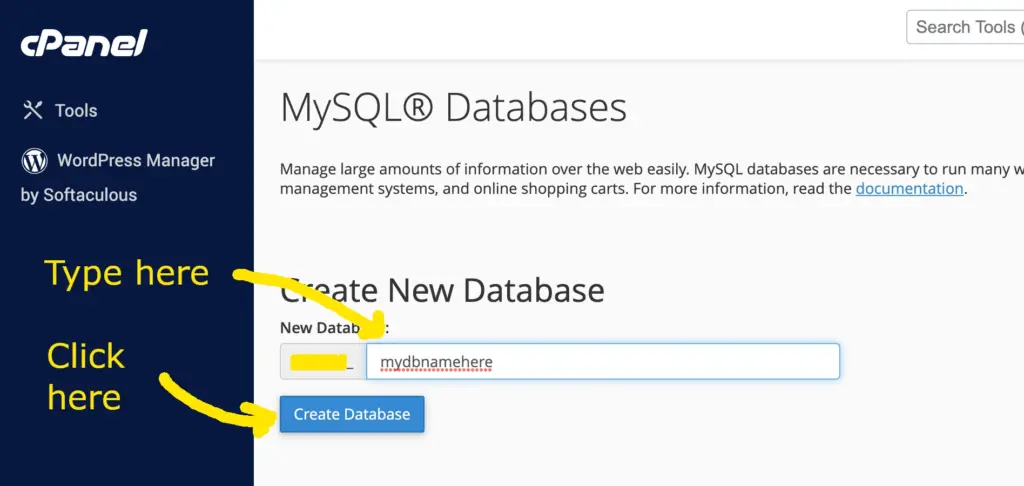
Now we want to create a database. By default cPanel will prefix the database name with the cpanel username and an underscore (which ultimately becomes part of the database name), you just get to choose the rest.
It doesn’t really matter what you choose but you do need to make a note of it, as you’ll need it when installing WordPress.
All you need to do is type something in the “New Database:” field, then click “create database”. I’ve used mydbnamehere just for example’s sake, and I’ve blanked out my cPanel username (for security purposes) but the cPanel username prefix is still part of the database name.
Remember to take note of the database name!
OK, let’s create a database, like this:
You’ll now see the database you’ve created in the list of databased on the same page:
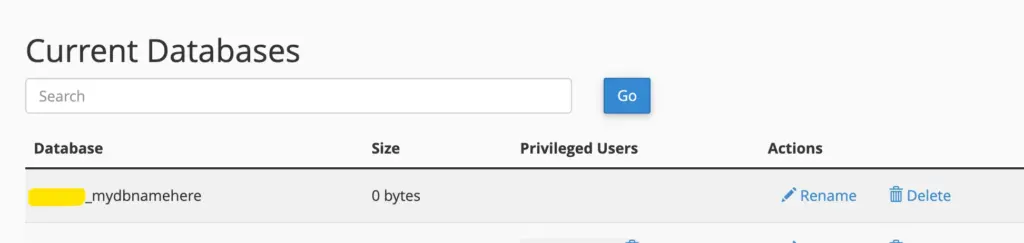
As you can see, the database is 0 bytes in size (because there’s nothing in it yet), and there’s no “Privileged Users” yet, because we haven’t yet created one. That’s what we’re going to do next. Again, you’ll need to make a note of the database username and the password you specify, as you’ll need these when installing WordPress.
Creating A database user.
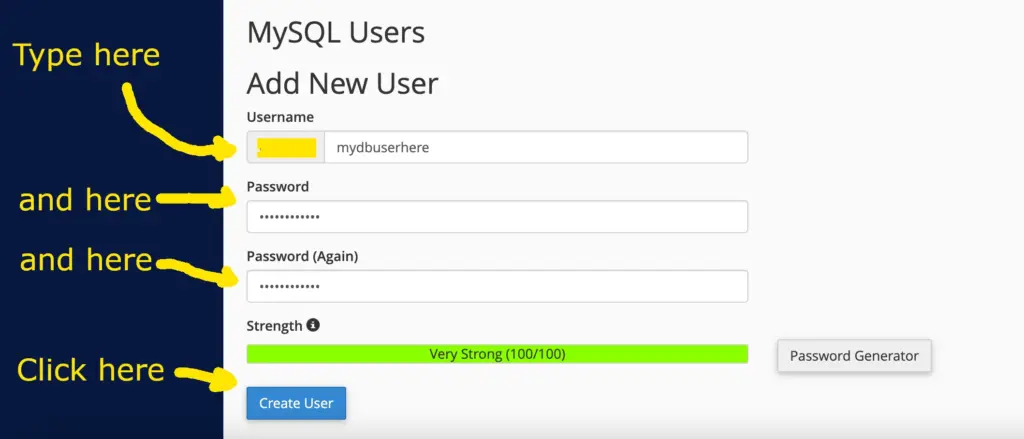
Find the section labelled “Add New User”. It looks like this:
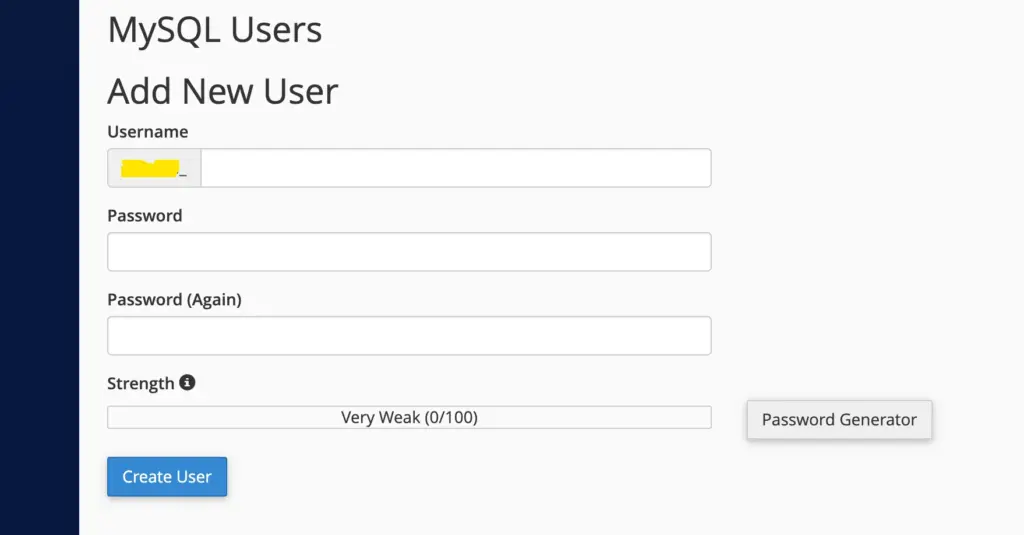
All you need to do is fill out the boxes (make sure you use a strong password AND make a note of it!), then click “create user”, like this:
And then finally we need to…
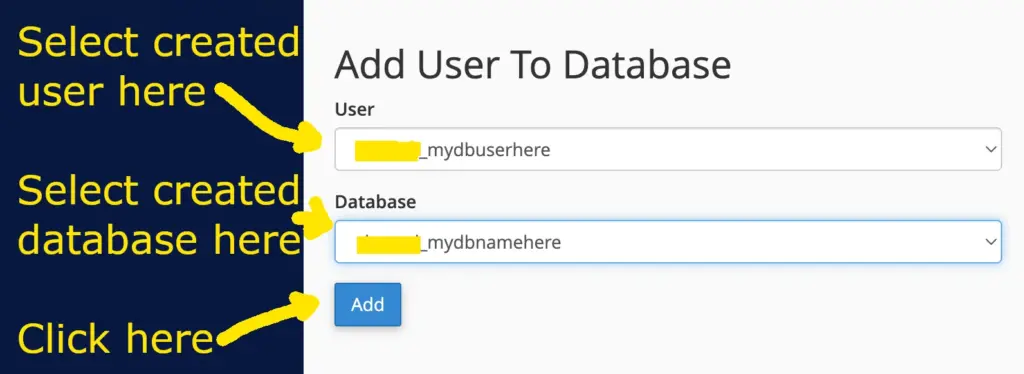
Assign the Database user to the database.
To do this, find the “add user to database” section. Then in the “user” drop down, select the user you’ve just created, and in the “database” field select the database you’ve just created. Then click “add”. Like this:
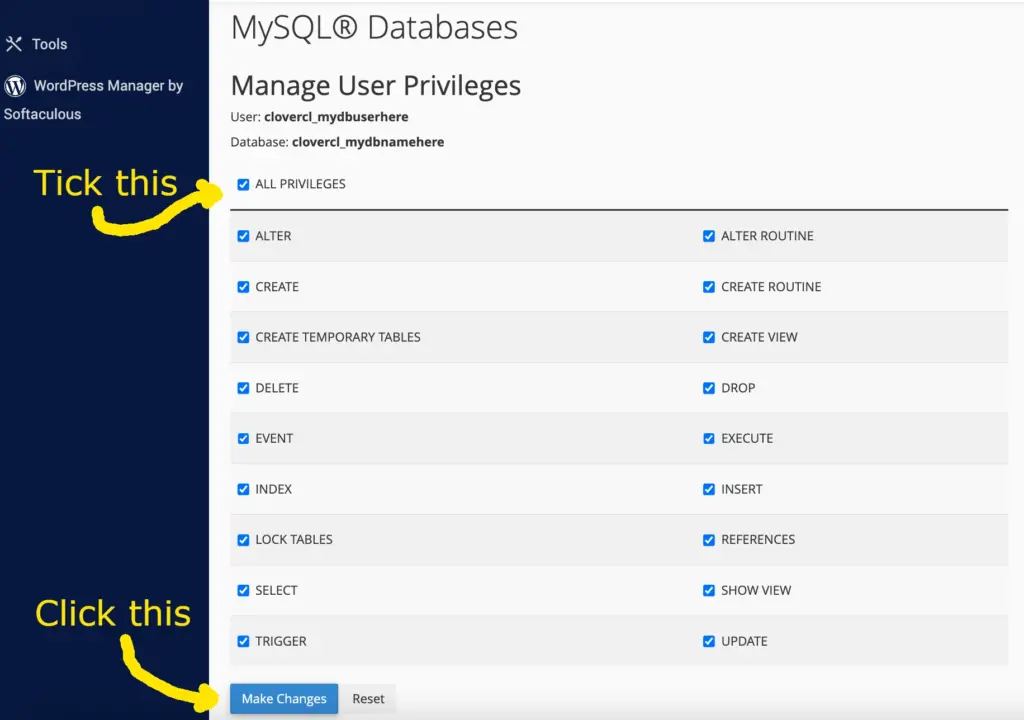
You’ll now be presented with a page that allows you to specify the “privileges” of the user. This tells MySQL what the user is allowed to do to the database. As we don’t know what WordPress (and the plugins and themes you install) will need to do to the database, we’re going to assign all privileges, so tick the “All Privileges” box, then click “Make changes”. Like this:
Congratulations, you’ve created a database, a database user, and assigned the user to the database. You can see this in the “current databases” section, like this:

You’re now finally ready to start installing wordpress!
